Imagine a world where delectable, fresh pasta is not just a restaurant luxury but a simple, achievable delight right in your own kitchen. And what if we told you it only takes three main ingredients and absolutely no fancy machinery? Welcome to the revolution of homemade vegan pasta!
For too long, making pasta from scratch has been shrouded in a myth of complexity, requiring expensive gadgets and a culinary degree. But today, we're demystifying the process, showing you exactly how to make vegan pasta at home that’s tender, flavorful, and incredibly satisfying. This isn't just a recipe; it's an invitation to a new culinary adventure, one where you control every delicious strand, all without needing a pasta maker!
Why Make Fresh Vegan Pasta from Scratch?
While most store-bought dried pasta is naturally eggless and therefore vegan, there's an undeniable magic that comes with crafting your own. The texture, the taste, and the sheer satisfaction of creating something wonderful with your own hands are unparalleled. Here’s why diving into homemade vegan pasta is a game-changer:
- Unmatched Freshness: Fresh pasta boasts a superior, delicate texture and a richer flavor that dried pasta simply can't replicate. It cooks faster and absorbs sauces beautifully.
- Ingredient Control: You know exactly what goes into your food. No preservatives, no questionable additives – just pure, simple ingredients. This is especially comforting for those with dietary sensitivities or a desire for clean eating.
- A Fun & Rewarding Process: There’s something therapeutic about kneading dough and transforming it into silky sheets. It’s a wonderful activity, whether you’re cooking solo or involving family and friends.
- Budget-Friendly: The core ingredients for homemade pasta are incredibly inexpensive, making it a very economical meal option compared to specialty fresh pastas from stores.
- Customization Galore: Once you master the basic technique, the world of pasta opens up. Experiment with different flours, add herbs, or even natural colorings to create unique pasta variations.
This recipe debunks the myth that you need to be an experienced chef or own an expensive pasta machine. A rolling pin and a little elbow grease are all you need to create beautiful, fresh vegan pasta. For a deeper dive into the foundations of making pasta without eggs, check out our guide on Homemade Eggless Pasta Dough: Your Guide to Fresh Vegan Pasta.
The Simple Ingredients: Your Foundation for Flavor
The beauty of this recipe lies in its elegant simplicity. You only need a few pantry staples to create an impressive dish. While we advertise "3-ingredient" pasta, it's really three *main* ingredients, plus the essentials of water and salt, which we often don't count in the "ingredient list" because they're always there!
- '00' Grade Pasta Flour: This finely milled wheat flour, originating from Italy, is the secret to tender, silky pasta. Its low protein content results in a dough that is pliable and smooth, perfect for rolling thin.
- Semolina Flour: Often confused with '00' flour, semolina (made from durum wheat) adds structure, a slightly coarser texture, and that signature golden hue to your pasta. It helps prevent stickiness and gives the pasta a satisfying bite. Using a combination of both creates the ideal balance of tenderness and chewiness.
- Olive Oil: A good quality extra virgin olive oil not only adds a subtle flavor but also contributes to the dough's elasticity and pliability, making it easier to work with and roll out.
- Water: The binder that brings everything together, hydrating the flours to form a cohesive dough.
- Salt: Essential for enhancing the flavor of the pasta itself, ensuring it’s not bland.
That's it! With these simple components, you're ready to transform basic ingredients into something extraordinary. This minimalist approach is also highlighted in our detailed article: Make Fresh Vegan Pasta at Home: Just 3 Ingredients, No Machine!
Mastering the Dough: Your Step-by-Step Guide
Making the dough is the heart of this process. Don't be intimidated; it's more about feel than precision, and a little practice makes perfect.
Step 1: The Flour Volcano (or Bowl Method)
- On a clean, lightly floured work surface, combine your '00' grade pasta flour and semolina flour. Add the salt and whisk them together.
- Form a large well in the center of your flour mixture, like a volcano. This well will hold your wet ingredients. Alternatively, you can do this in a large mixing bowl, which can be less messy for beginners.
Step 2: Mixing the Magic
- Pour the water and olive oil into the well.
- Using a fork, gently start incorporating the flour from the inner rim of the well into the wet ingredients. Work slowly, gradually pulling more flour into the center until you form a shaggy, combined mixture. If using a bowl, stir with a fork or your hands until a rough dough forms.
- Once most of the liquid is absorbed, discard the fork and gather the dough with your hands.
Step 3: The Art of Kneading
This is where the magic happens and gluten develops, giving your pasta its structure and elasticity. It requires a bit of effort, but it’s incredibly satisfying.
- Transfer the shaggy dough onto a lightly floured surface.
- Begin to knead the dough. Push it away from you with the heel of your hand, fold it back over, rotate it a quarter turn, and repeat.
- Knead for approximately 8-10 minutes. The dough will start off sticky and rough, but as you knead, it will become progressively smoother, more elastic, and less sticky. It should feel firm but pliable, like an earlobe.
- Tip: If the dough feels too dry and crumbly, add a tiny bit more water, a teaspoon at a time. If it’s too sticky, add a sprinkle of flour. Adjust until you reach that perfect smooth, elastic consistency.
Step 4: Resting for Perfection
Just like us, dough needs a rest! This crucial step allows the gluten to relax, making the dough easier to roll out and preventing it from shrinking back.
- Form the kneaded dough into a ball.
- Place it in a bowl and cover it tightly with a damp tea towel or plastic wrap.
- Refrigerate for at least 30 minutes, or up to an hour. This rest is non-negotiable for the best results!
Step 5: Rolling Without a Machine
This is where your trusty rolling pin shines! It takes a bit of patience, but the results are worth it.
- Divide your rested dough into two or three equal pieces. Working with smaller sections is much easier. Keep the unused dough covered to prevent it from drying out.
- Lightly flour your work surface and your rolling pin.
- Start rolling out one piece of dough. Begin from the center and roll outwards, rotating the dough frequently (after every few rolls) to ensure even thickness and to prevent it from sticking.
- Aim for a thinness that allows you to just barely see your hand through the dough – think credit card thin or even thinner for delicate pasta. For beginners, rolling between two sheets of parchment paper can make this process less sticky and allow for easier handling.
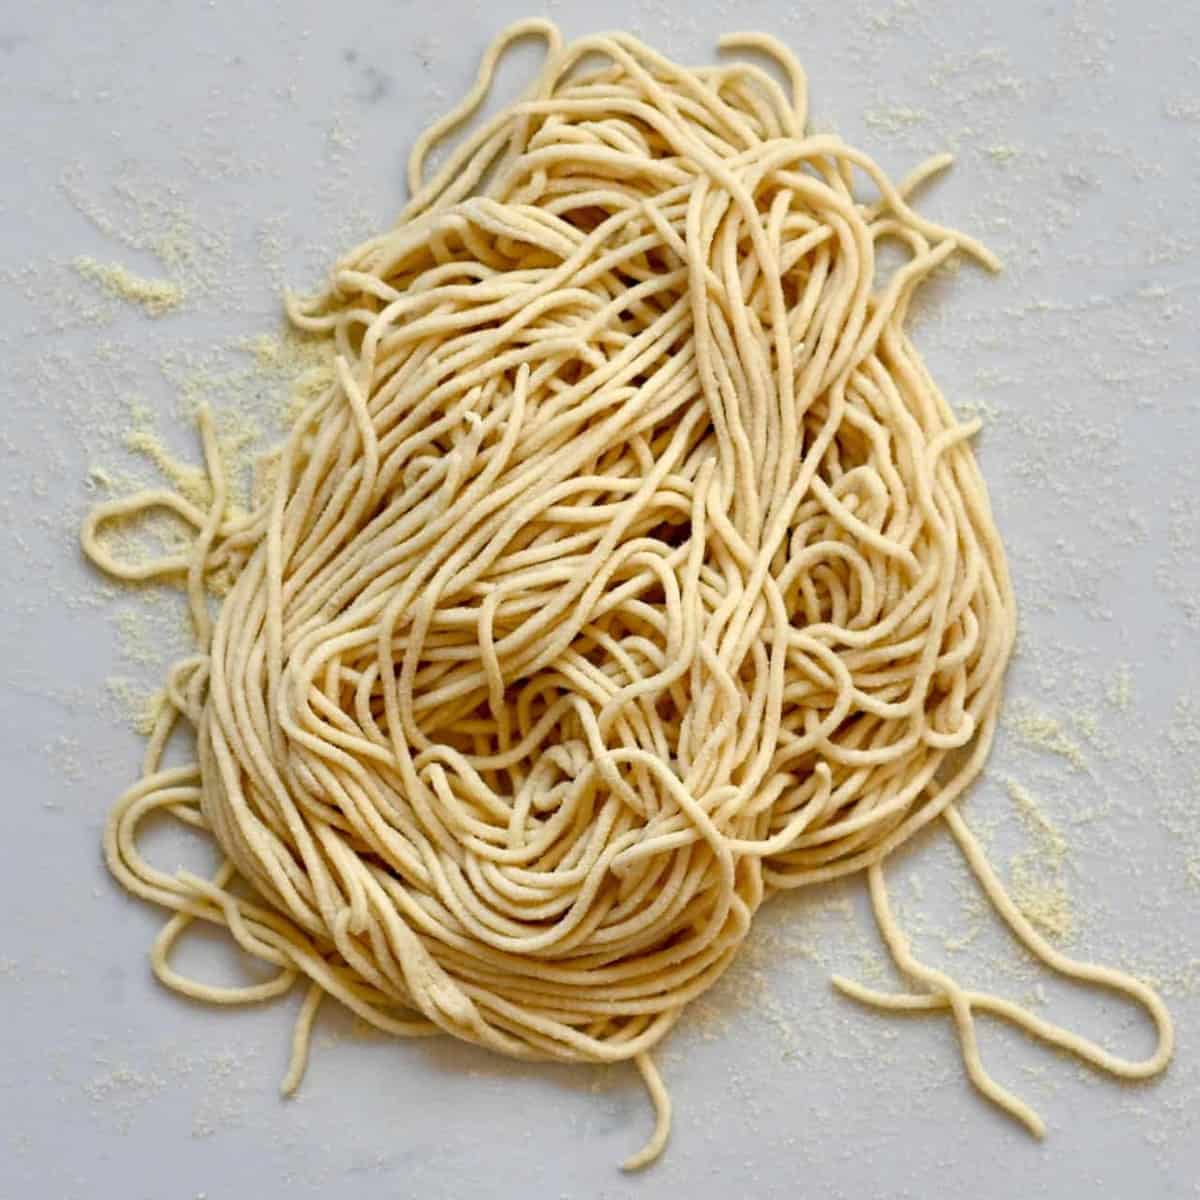
- Note on Shapes: Without a pasta machine, you are excellently suited for ribbon-style pasta like fettuccine, tagliatelle, or pappardelle. Once your dough sheet is rolled thinly, lightly dust it with flour, then gently fold it into a loose roll. Using a sharp knife, slice the roll into your desired width (e.g., ¼ inch for fettuccine, ½ inch for tagliatelle). Unfurl the strands immediately and dust with a little more flour to prevent sticking. For rounded shapes like spaghetti or capellini, a pasta machine is indeed recommended.
Cooking Your Fresh Vegan Pasta
Cooking fresh pasta is quicker than dried! Bring a large pot of salted water to a rolling boil. Add your freshly cut pasta and cook for just 2-4 minutes, depending on its thickness and your desired al dente preference. Fresh pasta floats to the top when almost done. Taste a strand to ensure it's cooked perfectly. Drain, reserving some pasta water, and toss immediately with your favorite vegan sauce.
Storing Your Homemade Creations
So, you've made a batch, but don't plan to eat it all right away? No problem!
- Short-term Storage (Same Day): Arrange fresh pasta in nests or lay flat on a lightly floured baking sheet. Cover with a damp cloth or plastic wrap and keep at room temperature for up to a few hours.
- Refrigeration (1-2 Days): Lightly dust the pasta with semolina flour to prevent sticking. Store in an airtight container or a zip-top bag in the refrigerator for up to 2 days.
- Freezing (Longer Term): For longer storage, freeze your pasta. Arrange it in nests or spread it out in a single layer on a floured baking sheet. Freeze until solid (about 30 minutes to an hour). Once frozen, transfer to an airtight freezer bag or container. Frozen pasta can be cooked directly from frozen; it may just need an extra minute or two in boiling water. It will keep well for up to 1 month.
Unleash Your Inner Pasta Artist
Once you've mastered this fundamental recipe, don't stop there! The world of vegan pasta is vast and exciting. Consider experimenting with different flours – whole wheat, chickpea flour, or even gluten-free blends (though these will require adjustments to the water ratio and kneading technique). You can also infuse flavors into your dough by adding spinach puree for green pasta, roasted red pepper for orange, or even a pinch of turmeric for a golden hue. The possibilities are endless, making every pasta night a unique culinary adventure.
Conclusion
Learning how to make vegan pasta at home is not just about making a meal; it's about embracing a satisfying, creative process that yields incredibly delicious results. This easy 3-ingredient recipe, achievable without any special equipment, empowers you to create fresh, tender pasta whenever the craving strikes. So grab your rolling pin, gather your simple ingredients, and prepare to impress yourself and your loved ones with the unparalleled taste of homemade vegan pasta. Happy cooking!
