Discover the Art of Homemade Vegan Pasta: Just 3 Ingredients, No Machine Needed!
Imagine a bowl of perfectly tender, fresh pasta, made by your own hands, entirely vegan, and all with just three simple ingredients and no fancy equipment. For too long, the idea of making pasta from scratch has been shrouded in myth, often conjuring images of complex machinery and a demanding process. But what if we told you that creating delicious, egg-free pasta at home is not only achievable but surprisingly simple? This comprehensive guide will show you exactly how to make vegan pasta at home, transforming your kitchen into an Italian trattoria without the need for a pasta maker or any animal products. Many believe that fresh pasta requires eggs for binding and texture, but we're here to shatter that misconception. Our method celebrates the humble combination of flour, semolina, and olive oil, proving that incredible flavour and a satisfying bite are well within reach for every home cook. Say goodbye to the dry, mass-produced varieties and embrace the unparalleled taste and texture of truly fresh, homemade vegan pasta.Why Embark on Your Homemade Vegan Pasta Journey?
Beyond the sheer delight of a freshly prepared meal, there are numerous compelling reasons to learn how to make vegan pasta at home. While most store-bought dry pasta is naturally eggless, there's an undeniable magic that comes with crafting an entire dish from scratch. Firstly, freshness is key. Homemade pasta boasts a superior flavour and a delicate, yielding texture that simply can't be replicated by dried alternatives. It cooks faster and absorbs sauces more beautifully, elevating any meal from ordinary to extraordinary. Secondly, you gain complete control over the ingredients. For those following a vegan diet, knowing exactly what goes into your food provides peace of mind. This recipe avoids eggs entirely, relying on plant-based components for a rich, satisfying dough. Furthermore, once you master this basic technique, you can easily experiment with different flours – think whole wheat, spelt, or even gluten-free blends – to tailor the pasta to your specific dietary needs and preferences. If you're keen to explore more about the foundational elements, this article on Homemade Eggless Pasta Dough: Your Guide to Fresh Vegan Pasta offers deeper insights. Finally, there's the immense satisfaction of creation. The process itself can be therapeutic and rewarding, turning a simple cooking task into a mindful experience. Plus, it's a fantastic way to impress friends and family with your culinary prowess! You'll quickly discover that this isn't just a recipe; it's an introduction to a wonderfully creative and flavourful world.The Essential Ingredients for Your Vegan Pasta
The beauty of this recipe lies in its minimalist approach. You only need a handful of pantry staples to create a dough that’s both pliable and delicious. Here’s what you’ll need to kickstart your journey into making fresh vegan pasta at home:- '00' Grade Pasta Flour: This finely milled wheat flour is a classic choice for pasta making. Its low protein content results in a tender, silky dough that's easy to roll and stretch.
- Fine Semolina Flour: Derived from durum wheat, semolina adds structure, a slightly coarser texture, and that signature 'bite' to your pasta. It also helps prevent sticking during rolling and cooking.
- Olive Oil: A good quality extra virgin olive oil not only adds a subtle flavour but also contributes to the dough's elasticity and pliability, making it easier to work with.
- Water: The binder that brings everything together, creating a cohesive dough.
- Salt: Essential for flavour, ensuring your pasta isn't bland.
Step-by-Step: Crafting Your Vegan Pasta Dough
Mastering how to make vegan pasta at home begins with the dough. Follow these steps carefully, and you’ll be well on your way to a perfect batch.1. Prepare Your Workspace and Combine Dry Ingredients
Clear a clean, spacious work surface (a large cutting board or countertop works well). In a large bowl or directly on your work surface, combine the '00' grade pasta flour and fine semolina flour. Add the salt and mix thoroughly, ensuring the salt is evenly distributed.
2. Create a Well and Add Wet Ingredients
Form a mound with the flour mixture, then create a deep well in the centre, much like a volcano. Pour the water and olive oil into the well. This method allows for a gradual incorporation of the wet and dry ingredients, preventing lumps.
3. Mix and Form the Dough
Using a fork, start gently incorporating the wet ingredients into the surrounding flour, gradually drawing flour from the sides into the centre. Continue mixing until a shaggy, well-combined mixture forms. At this point, you can discard the fork and use your hands to bring the dough together into a rough ball.
4. Knead for Smoothness and Elasticity
Transfer the dough onto a lightly floured surface. Now comes the kneading – the most crucial step for developing gluten and achieving that ideal pasta texture. Knead the dough vigorously for about 10-15 minutes. The dough should transform from rough and sticky to smooth, elastic, and supple. To test for readiness, press your finger into the dough; if it springs back slowly, it’s likely ready. If the dough feels too dry and crumbly, add a tiny bit more water (a teaspoon at a time). If it's too sticky, dust with a small amount of flour. Avoid adding too much flour, as this can make the pasta tough.
5. Rest the Dough
Place the kneaded dough in a bowl and cover it tightly with a damp tea towel or plastic wrap. Refrigerate it for at least 30 minutes. This resting period is vital, as it allows the gluten to relax, making the dough much easier to roll out thinly without resistance.
Rolling and Shaping Without a Machine
This is where the magic of "no machine" truly comes into play. With a good rolling pin and a little patience, you can create beautifully thin pasta sheets.1. Prepare for Rolling
Remove the dough from the refrigerator. Cut the dough into two equal pieces; it's much easier to work with smaller sections. Lightly flour your work surface and your rolling pin.
2. Roll Out the Dough
Place one piece of dough on your floured surface. Begin rolling, applying even pressure from the centre outwards. Turn the dough frequently to ensure even thickness and to prevent it from sticking. A handy trick is to roll the dough between two sheets of parchment paper, which helps prevent sticking and makes it easier to achieve a very thin sheet. Continue rolling and stretching until the dough is incredibly thin – you should almost be able to see through it. The thinner the better for delicate pasta.
3. Shape Your Pasta
Once your dough is rolled out to your desired thinness, it's time to shape! For classic ribbon pasta like tagliatelle or fettuccine, lightly dust the sheet with semolina flour to prevent sticking, then gently fold the dough lengthwise a few times to create a loose log. Using a sharp knife, cut across the folded dough to create strips of your desired width. Unfurl the strips immediately and lay them out on a lightly floured surface or a drying rack to prevent them from clumping together. While a machine is recommended for perfectly rounded spaghetti, this hand-rolling method excels at producing delightful ribbons.
Cooking, Storing, and Enjoying Your Homemade Creation
Now that you know how to make vegan pasta at home, it’s time for the delicious payoff!Cooking Your Fresh Pasta
Fresh pasta cooks much faster than dried pasta. Bring a large pot of heavily salted water to a rolling boil. Gently drop your fresh pasta into the boiling water. It will typically cook in 2-4 minutes, depending on its thickness. Taste a piece to ensure it's al dente – tender but still with a slight bite. Drain immediately and toss with your favourite vegan sauce.
Storing Homemade Vegan Pasta
If you're not cooking all your pasta immediately, you have a few options for storage:
- Refrigeration: For short-term storage (1-2 days), allow your freshly cut pasta to air dry for about 30 minutes to an hour to prevent sticking. Then, place it in an airtight container or a Ziploc bag in the refrigerator.
- Freezing: For longer storage, dust the pasta generously with semolina flour. Arrange it in single layers on a baking sheet and freeze until solid (about 30 minutes to an hour). Once frozen, transfer the pasta to airtight freezer bags. Frozen fresh pasta can be cooked directly from frozen, though it may take an extra minute or two.
Sauce Pairings and Beyond
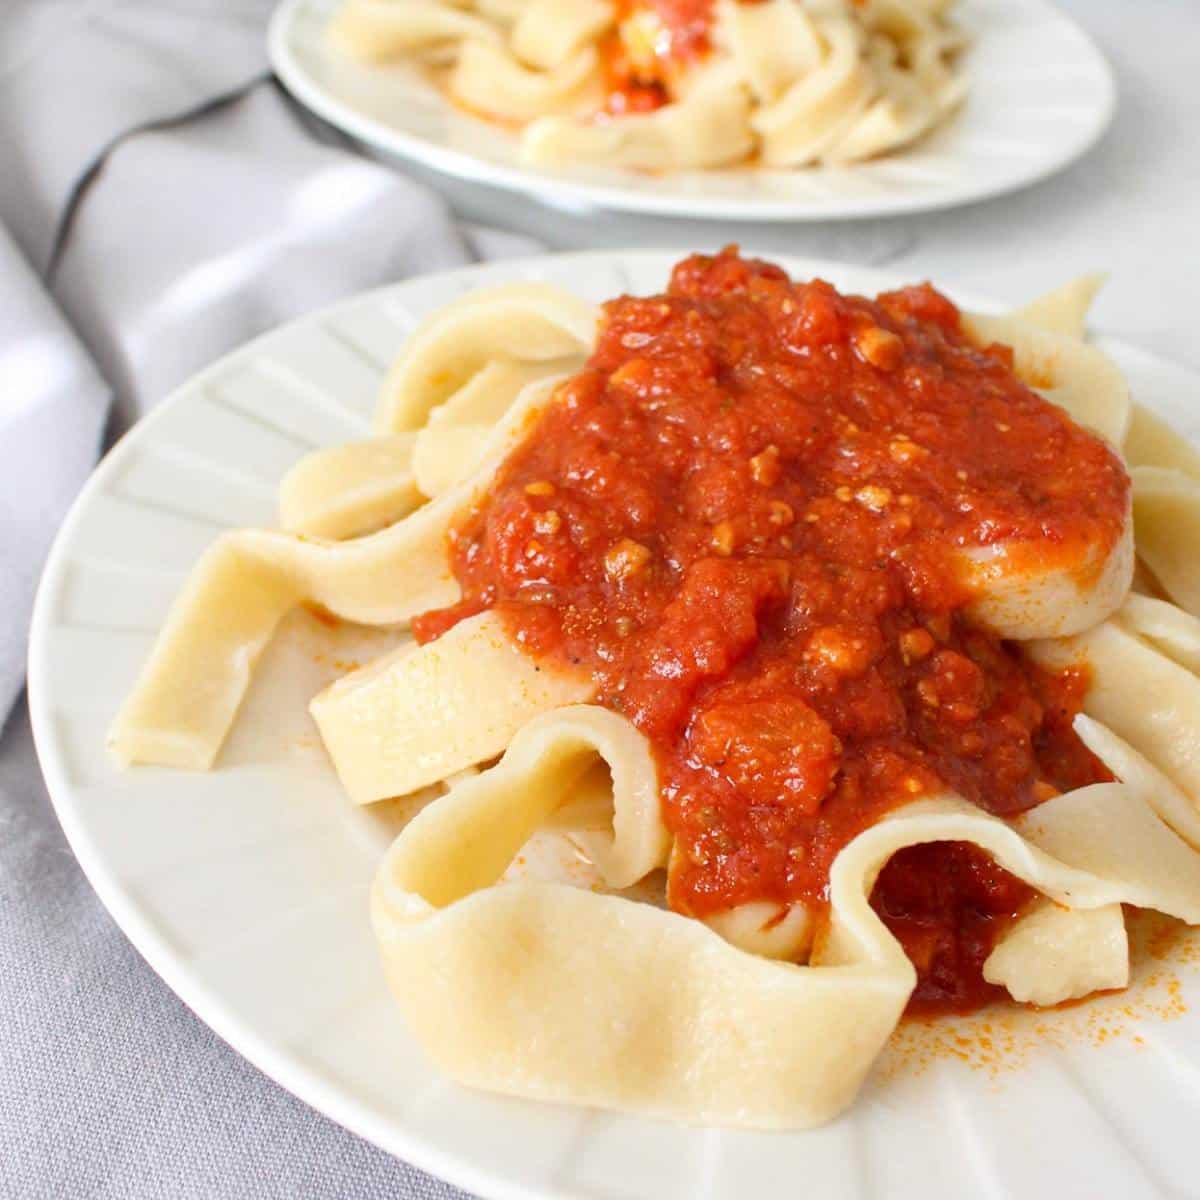
The beauty of homemade vegan pasta is its versatility. It pairs wonderfully with a wide array of plant-based sauces. Consider a rich marinara, a creamy cashew-based Alfredo, a vibrant pesto (ensure it's dairy-free!), or simply toss it with sautéed garlic, olive oil, and fresh herbs. Don't be afraid to experiment with different flours for unique textures and flavours – a whole wheat dough adds a rustic touch, while a spelt flour base offers a slightly nuttier profile. The possibilities are truly endless once you master this fundamental recipe!
